Tuesday, December 25, 2012

Traditions ... with Peanut Butter Balls


One thing always happens as the Christmas holidays get closer - we start digging through family recipes looking for those tastes and smells that bring back wonderful memories.  For the past few years, our children have carried on one of our Christmas family cooking traditions by making their Grandma's Peanut Butter Balls.  I don't remember a Christmas that my mother-in-law Jane did not have a bucket full of these wonderful little nuggets and as you can see this recipe has seen quite a few holidays.  I'm delighted that my children are keeping the tradition going.


In her younger days, Jane worked in our local high school cafeteria.  She brought home this recipe and after considerable calculating, worked it from a serves-700-or-so to a more manageable family size.  The last few years she was with us, our children helped with her Christmas baking and treat preparations.  So now, they can turn out some mighty fine Peanut Butter Balls, but of course, they learned from one of the best.


Peanut Butter Balls
1 pound butter, melted
2 cups peanut butter
1/4 cup vanilla flavoring
2 pounds powdered sugar
1/2 pound raisins
3/4 quart coconut (1 large & 1 small can)
1 stick paraffin wax
2 cups semi-sweet chocolate chips


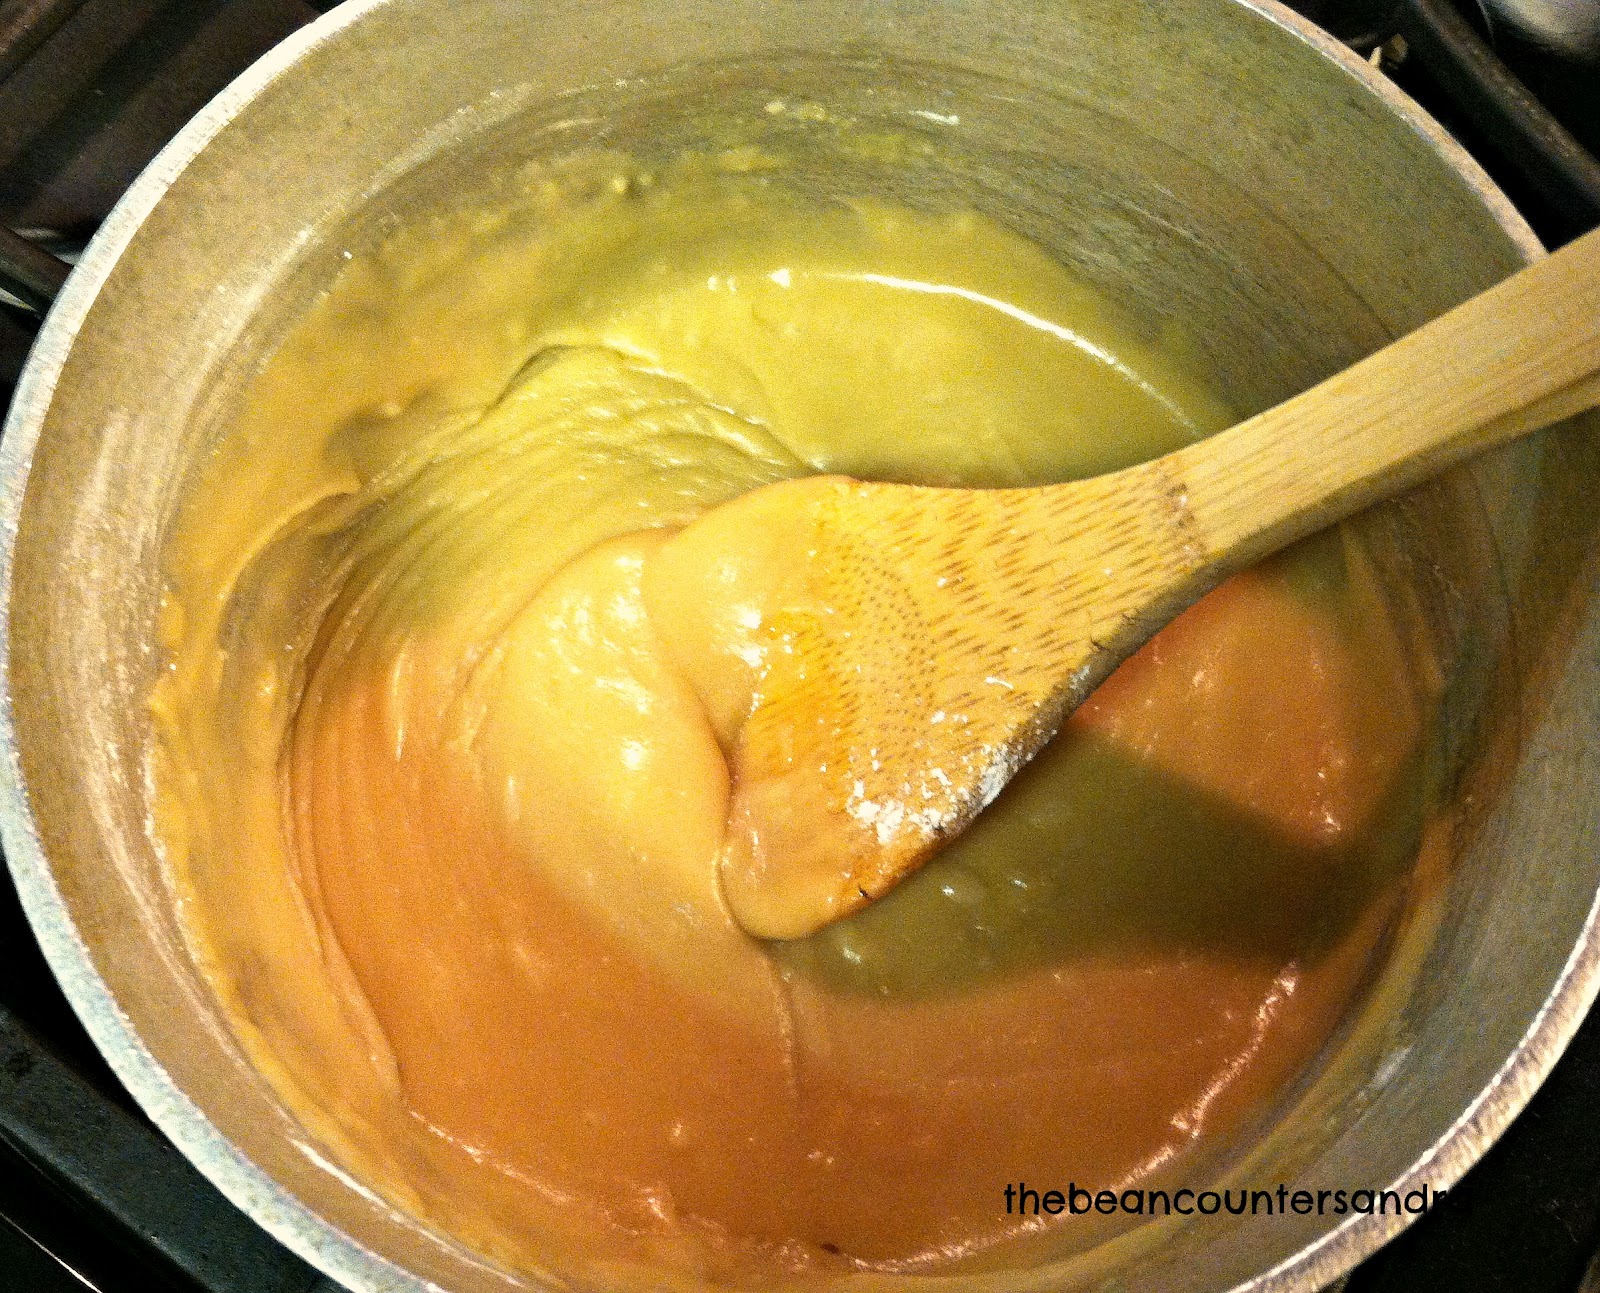
Mix all ingredients, except paraffin and chocolate chips, until thoroughly blended and roll in one-inch balls.  Place on cookie sheets covered with wax paper. Pierce each ball with a toothpick for easier dipping later. Refrigerate until firm.


Melt paraffin and chocolate together in the top of a double boiler.  Dip each ball into chocolate mixture.  Return to wax paper to let chocolate dry.  Store in refrigerator.

I personally can eat my weight in these and my scales will attest that I have often tried to do just that.  

This recipe will yield 6-7 dozen, depending on your interpretation of one-inch balls.  We chose to half the recipe ... I'm hoping for more restraint this year.


Pin It


Linking up at these great sites:
Mix It Up Monday
Crazy Sweet Tuesday
Thursday's Treasures
Your Creative Timeout Party
Strut Your Stuff Saturday


Monday, November 19, 2012

Pumpkin Cheese Ball

But there's no pumpkin in it, it just looks like a pumpkin or at least that is the intention.

I've been away for awhile, spending my nights on more important tasks like helping my son complete college and scholarship applications.  He's almost done. So now the waiting for decisions (including his) and waiting for  offers (hopefully, good ones) has set in.

Can we say "empty nest?"  It's almost here, sigh ...

Our annual Thanksgiving luncheon at work was last week and since the list looked like every side dish and dessert was covered I opted for an appetizer. And, since I waited until the last minute, it had to be something quick and simple.  This recipe for Pumpkin Cheese Ball is from a 2009 Southern Living. Definitely a quick and simple fix however I changed the cheese combination slightly.  It called for goat cheese and I'm not very fond of goat cheese and chose not to inflict that pain on anyone else.  I think this combination works very well, but if you like cheese of the goat you might want to try it in it's original format.

Pumpkin Cheese Ball

2 10-ounce blocks Extra Sharp Cheddar Cheese (one yellow and one white)
1 8-ounce cream cheese, softened
1 8-ounce tub garden vegetable cream cheese (here is where you can substitute 8-ounces of goat cheese)
1/2 teaspoon Italian seasoning
1/2 teaspoon black pepper
braided pretzel stick


Shred both blocks of cheddar cheese; set aside.  Blend together both cream cheeses in a small bowl; stir in Italian seasoning and black pepper.


Add cream cheese mixture to shredded cheddar cheese, mixing until combined thoroughly.  Here is where the bare hands work better than a spoon.


Roll cheese into a ball; flatten slightly and press an indention in the top to begin to form a pumpkin shape.  Wrap in plastic wrap and refrigerate several hours or overnight to firm.

The trouble with making a cheese ball is that so much of it hangs behind in the bowl, but of course, that just means you can grab a spoon and take care of it. And I did. 


Score the cheese ball to form pumpkin ridges.  The end of a spoon works nicely to draw the ridges, then use your fingers to smooth the edges.  Press pretzel stick into the top and serve with sliced vegetables or crackers.


And while I put this cheese ball together, my son prepared a delicious supper of Spaghetti Pie.  Do you think I could move to college with him?


Pin It
Linked up at:
Trick or Treat Tuesday
Thursdays Treasures
Strut Your Stuff Saturday


Saturday, September 15, 2012

Nutty Danish Pastry


Melt in your mouth?  Yes, Nutty Danish Pastry will do just that.

I found this pastry in a long-forgotten magazine at least 25 years ago and pulled it out for that brunch we hosted recently.  This is a fairly simple recipe but there are three specific steps that at first glance may lead you to think it is much more complicated.

The key is taking it one step at a time, and taking your time, but it is so worth the time spent.  I love this pastry's shortbread-like bottom layer and the top layer is one of my favorites when it comes to frosting.

Nutty Danish Pastry

Layer one:
1/2 cup margarine
1 cup all-purpose flour
2 tablespoons water

Cut 1/2 cup margarine into flour until crumbly.  Sprinkle 2 tablespoons water evenly over surface; stir with a fork until moistened.  Shape into 2 equal balls. Place each ball on a parchment-lined baking sheet and flatten into a 12-x3-inch rectangle.


Layer two:
1/2 cup margarine
1 cup water
1 cup all-purpose flour
3 eggs
1 teaspoon vanilla

Combine 1/2 cup margarine and one cup water in a medium saucepan; bring to a boil.  Add one cup of flour.  Reduce to low heat and cook, stirring constantly, until mixture forms a ball and leaves the sides of the pan.  Remove from heat and cool for 5 minutes.  Add eggs, one at time, mixing well after each addition. Stir in vanilla.


Divide mixture evenly onto the 2 pastry rectangles and spread until covering the first layer from end to end.  It will seem like way too much but it is the thicker layer so just keep spreading.  Bake at 350 degrees for 55 minutes until set and golden brown.


Frosting
1/4 cup margarine
1/2 cup light brown sugar
1 1/2 to 2 tablespoons milk
1 1/2 cups sifted powdered sugar
1/2 teaspoon vanilla extract
1/2 cup chopped pecans, divided

Melt 1/4 cup margarine in a medium saucepan.  Stir in brown sugar and cook over low heat about one minute.  Add 1 1/2 tablespoons milk, sifted powdered sugar, and vanilla.  Use remaining 1/2 tablespoon of milk, if needed, for better consistency.  I used the full 2 tablespoons.

  
Spread frosting evenly over the two pastries while still warm.  This frosting sets in the blink of an eye so you will need to work quickly.  Sprinkle 1/4 cup chopped pecans on each.


Slice each pastry crosswise into 12 1-inch pieces.


Serve immediately, or if serving later cover and refrigerate then bring back to room temperature when you're ready.


Pin It
Linking up at -

Monday, September 10, 2012

Easy Sew Table Linens


I'm stepping away from the kitchen for a quick sewing project.  Several weeks ago we were host to a brunch and wanted to change up the look of the dining table.  With a few yards of a fabric remnant picked up at a discount sewing center and a few hours at the sewing machine I was able to create napkins and a table runner to give the table a fresh new look complemented quite nicely by my husband's floral decorating skills.

For the napkins ...
Begin by cutting squares of fabric to equal your desired finished size plus about 3 inches to allow for hemming.  My squares were 20" for a 17" finished napkin. Fold the raw edge over 1- to 1 1/2 -inches and press all around, then press in 1/4-inch all around the edge.


At each corner, fold in diagonally, lining up the pressed creases, then lightly press the folded edge.


Fold corner edges right sides together, and pin.


Stitch along the pressed diagonal crease and trim away excess fabric.


Repeat for the other three corners.
Turn hem to the wrong side of napkin square.


Edge stitch all around and press finished napkin.


And, for the runner ...


Cut a strip of fabric to desired length and width to fit nicely down the center of your table.


Fold right sides together and trim away a small triangle to give a pointed end to your runner.  To make sure both ends are identical, place the cut triangle on the other end and trim to match.


Press in 1/4-inch along raw edge all around the runner.


For a clean hem, you can fold in another 1/4-inch and press or simply fold in as you sew, encasing the raw edge.  As you reach the corners, stitch within a few inches of the corner, stop and tuck underneath the upcoming side; pin or hold in place as you sew around the turn.  Press well.


And here is the finished look, complete with inexpensive purchased place mats, candles, and flowers arranged as only my husband can.

I think I'll keep him.

P.S.  He's also a great cook, so I know I'm going to keep him.


Linking up at ...
Strut Your Stuff Saturday
Trick or Treat Tuesday
Riverton Housewives Roundup #33

Sunday, September 2, 2012

Strawberry Tea


Trying to squeeze as much summer out of summer as you can?

Strawberry Tea is a great warm weather drink and is quite refreshing for those last days of summer when like me, you want to hang on to the warmth as long as possible.

Strawberry Tea
1 (10-ounce) package frozen strawberries, thawed
1 1/2 quarts water
3 family-size tea bags
1/2 cup sugar
1 (6-ounce) frozen lemonade concentrate, thawed and undiluted
1 (2-liter) bottle lemon-lime carbonated beverage, chilled

Place strawberries in a food processor; process until smooth, stopping at least once to scrape down the side.


Bring water to a rolling boil then add tea bags.  Cover and steep five minutes.


Remove tea bags.  Stir in sugar, lemonade concentrate, and strawberry puree then place in refrigerator to chill.


When ready to serve, pour chilled lemon-lime soda into strawberry mixture.  Stir until well blended.  Pour over ice and garnish with sprigs of fresh mint or slices of fresh strawberries.

This recipe is from a June 1994 Southern Living and I've made this more times than I can count.  It's not only delicious simply as a fruity tea but it makes a wonderful punch as well.  Simply freeze part of the mix as an ice ring, decorated with fresh berries and mint leaves, place in punch bowl and add remainder of tea.  

Linking up at ...
Mix It Up Monday
Trick or Treat Tuesday
Thursday's Treasures at Chocolate Chocolate and More
Weekend Potluck #34
Strut Your Stuff Saturday Week #61
Share It Saturday

Friday, August 24, 2012

Healthy-er Oatmeal Cookies

My husband was on the prowl for a healthier bite of something sweet and I ran across this recipe taken from Martha Stewart a few years ago.

Oatmeal = fiber, that's a good thing.

Raisins = a fruit serving, that's another good thing.

Also, I could easily replace the whole egg with a liquid egg substitute.
.
The result was a nice, chunky little cookie that makes you feel it's okay to indulge your sweet tooth a little.

Preparation is very easy, requiring only a couple of bowls and spoons and no need to haul out the mixer.

Healthy-er Oatmeal Cookies
1/2 cup whole wheat flour
1/2 cup all purpose flour
1 teaspoon baking powder
1/3 cup vegetable oil
2/3 cup packed dark brown sugar
1 large egg (or 1/4 cup egg substitute)
1 teaspoon vanilla extract
1/2 cup old-fashioned oats
1/2 cup golden raisins

Preheat oven to 350 degrees.  In a medium bowl, whisk together both flours and baking powder and set aside.

In a large bowl, whisk together the oil, sugar, egg and vanilla.  Stir in flour mixture.

Add oats and raisins, mixing until well blended.

Drop by well-rounded tablespoon onto a parchment-lined baking sheet.  These cookies do not spread very much when baking, so I used the side of a spoon to flatten slightly.

Bake 15 minutes.  Cool on baking sheet for 5 minutes, then transfer to a wire rack to cool completely.  Yield about two dozen cookies ... well, at least I started with two dozen.  Somebody has to do the sampling.

Then husband said, "Maybe you could make these even healthier by using applesauce instead of oil."  I've made that swap before usually with good results, so I thought I would give it a try.

I strongly advise against that substitution.

That is, unless you enjoy nibbling on a cookie that bounces back against your teeth when you bite.  The longer they sit, the more bouncing action you get ... kind of like I would imagine biting into a half-baked wafer of silly putty.

Stick with the original recipe, or do the egg swap if you like.  Either way you should end up with a healthy enough cookie with a great sweet and fruity flavor.

Linking up at
Six Sisters Strut Your Stuff Saturday
BruCrew Life's Trick or Treat Tuesday
The Gooseberry Patch Recipe Round-Up
Weekend Potluck #33


Sunday, August 12, 2012

Tater-Tot Casserole


5 ingredients plus seasonings!!
My idea of a quick and delicious weeknight meal.


Our first football game is this week which means we are heading full steam ahead into another marching band season.  Mixed feelings on that one though, because this is our last marching band season.  My baby is now a high school senior!

After school rehearsals, weekend ballgames, weekend marching competitions, all team up to add a few more layers of busy-ness to our schedule so anything quick and easy is very much in order right now.


Tater-tot casserole goes together before you can turn around twice and bakes almost as quickly.


Tater-Tot Casserole

1 lb. lean ground beef or turkey
salt & pepper to taste
1/2 cup chopped onion
1 can cream of chicken soup
(or cream of mushroom but I am not a fan of mushrooms, in fact, I dislike them intensely)
frozen tater tots
shredded colby-jack cheese

Press ground meat in the bottom of an 8- or 9-inch casserole dish.  Season with salt and pepper then sprinkle with chopped onions.


Spread soup over onions and top with a layer of frozen tater tots, placed end to end and squeezing in as many as you can.


Cover with a generous sprinkling of shredded cheese and bake at 400 degrees for about 35 minutes until bubbly.


While the casserole is baking, mix up a nice, green salad and you have yourself a meal.

Pin It

 
Linking up at ...
Mix It Up Monday
Trick or Treat Tuesday
Weekend Potluck #31 
Strut Your Stuff Saturday
Gooseberry Patch Best Back to School Recipes 


Thursday, July 26, 2012

Spaghetti Pie

This was a staple in our cabinet when I was growing up.

We had Kraft spaghetti at least once every other week if not more often.  And, the sauce was made from the directions on the box using the herb seasoning packet included and usually a pound of cooked and crumbled ground beef.

To me, it's hard to beat.

This was confirmed years ago when we had out of town family over for dinner, the daughter bringing a boyfriend with her.  He filled his plate several times and said over and over how wonderful the spaghetti was.  As it turned out, his grandmother was an Italian immigrant!  That's someone who should know his spaghetti so what a compliment for Mother's simple boxed version!

Here is a little variation on the usual plate of spaghetti.

Spaghetti Pie
1 package Kraft Tangy Italian Spaghetti Dinner
2 eggs, beaten
2 tablespoons chopped fresh parsley
2 cups shredded mozzarella cheese
2 8-ounce cans tomato sauce
shredded parmesan cheese

Prepare spaghetti according to package directions and drain well.  Stir in eggs, parsley, and the package of grated parmesan cheese included in the box.

Place half of the spaghetti in a greased 9-inch pie plate.  Sprinkle one cup of shredded mozzarella.  Repeat layers.  Bake in a 350-degree oven for 12-15 minutes.

While spaghetti is baking make sauce as the box directs, using the tomato sauce option.  Empty the two cans in a medium saucepan, stir in herb seasoning and 1/2 can of water.  Heat until warm.  

Slice spaghetti in wedges just as you would a pie, top with sauce and a sprinkling of parmesan cheese.
Pressed for time on a weeknight?  Spaghetti Pie can be ready to serve in about 30 minutes!  Add a salad, some garlic bread, and you're done.

Linking up at ...
Strut Your Stuff Saturdays at Six Sisters' Stuff 
Weekend Potluck #28 
Trick or Treat Tuesday 
Thursday's Treasures
Mix it Up Monday at Flour Me With Love